SOLIDWORKS PDM
Use guide for PDM
- File Organization and Naming Standards for SolidWorks PDM
- How to use PDM (pt. 1)
- How to use PDM (pt. 2)
File Organization and Naming Standards for SolidWorks PDM
This page outlines the proper structure and naming conventions for organizing files within each subteam’s folder on SolidWorks PDM. If reference is needed, use “Hinge” in PDM. [NOTE: THIS PAGE IS UNDER EDITING]
 Folder Structure
-
[Subteam] Folder
-
-
This is the top-level folder for the respective subteam.
-
-
-
System Folders
-
-
-
-
Each system should have its own dedicated folder within the subteam folder, named after the system (e.g., HINGE).
-
-
-
-
-
There should only be folders at this level within the sub team folder.
-
-
-
-
-
Within Each System Folder
-
-
-
-
-
-
[System Name] DWGs: Contains all parts and assembly drawings for the system.
-
-
-
-
-
-
-
[System Name] ASSY: Contains the system ASSY (assembly), which includes all parts and subassemblies.
-
-
-
-
-
-
-
-
[System Name] OTS: Holds files for over-the-shelf (OTS) parts, i.e., parts that are not custom-made.
-
-
-
-
-
-
-
-
-
-
OTS parts should NOT be renamed from manufactures’ designation.
-
-
-
-
-
-
-
-
-
[System Name] INSTL: The INSTL (installation) file, which is the master assembly mounted onto the entire car i.e. shows the system installation. NOTE: THIS IS AN ASSEMBLY FILE AND SHOULD BE THE ONLY FILE THAT IS NOT A FOLDER AT THIS LEVEL.
-
-
-
File Naming Conventions
-
Custom-Made Parts
-
-
File Name: [Part Name] - [System Name]
-
-
-
Example: DRIVER LINK - HINGE
-
-
Drawing Files
-
-
File Name: [Part Name] - [System Name] DWG
-
-
-
Example: DRIVER LINK - HINGE DWG
-
Example Folder Structure
Auxiliary
-
HINGE
-
HINGE ASSY
-
GROUND LINK - HINGE
-
DRIVER LINK - HINGE
-
HINGE ASSY
-
HINGE OTS
-
Some Bolt 101224
-
Some Nut 163549
-
HINGE INSTL
-
HINGE DWGs
-
GROUND LINK - HINGE DWG
-
DRIVER LINK - HINGE DWG
These guidelines are effective January 2025 in order to ensure the Auxiliary Team can ensure consistency and efficiency when managing files on SolidWorks PDM. If you have any questions or require clarification, please reach out to the team lead.
How to use PDM (pt. 1)
Solidworks PDM is a server based cloud that stores all of the solidworks part files the team designs. It features version control, file check in / check out, and component hierarchy control. If used properly, it works very well. If used improperly, it will ruin you and your lead/chief engineers life.
At all costs, avoid working locally unless absolutely necessary. It saves everyone time in the long run.
This is part 1 of the guide, which covers access and usage relating to it not breaking your whole computer.
Part 2 (here) covers the actual usage of the software in solidworks
GETTING ACCESS:
To start, you need to 1) download the software package and 2) be added to the server as a user with your UF EMAIL. This will allow you to sign in to the blue box that pops up when you try to open the "vault" (what the folder is called). The team typically adds people twice every semester. Don't miss it. And don't use a personal email. The username and password will be whatever your school info is.
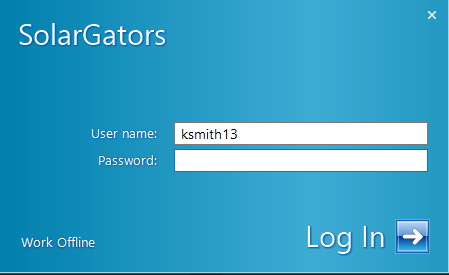
If you can't get the blue box to pop up, right click the vault and hit the "log in" button. You can also right click the vault and hit the "log out" button if you need to log out (more on that later).
NETWORK:
Solidworks PDM requires being on the network that the server is hosted on. In our case, this is being on the UF network in person or VPN. This is what will cause issues with PDM blowing up your computer.
What often happens is you may finish work on something or close your laptop and then your VPN will disconnect, and you will not reconnect it. You are now in purgatory, where your PDM is signed in but you are not on network. If attempt to access your files via file explorer, you may experience either:
1) Very slow functioning file explorer
2) File explorer keeps crashing
3) An endless stream of
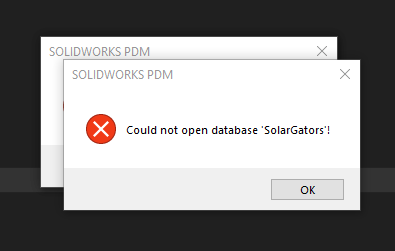
THE ONLY WAY TO FIX THIS IS TO LOG BACK INTO THE UF NETWORK AND THEN SIGN OUT OF PDM MANUALLY
OR
RESTART YOUR COMPUTER
How to use PDM (pt. 2)
Solidworks PDM is a server based cloud that stores all of the solidworks part files the team designs. It features version control, file check in / check out, and component hierarchy control. If used properly, it works very well. If used improperly, it will ruin you and your lead/chief engineers life.
At all costs, avoid working locally unless absolutely necessary. It saves everyone time in the long run.
This is part 2 of the guide, which covers the actual usage of the software in solidworks
Part 1 (here) covers access and usage relating to it not breaking your whole computer.
GETTING PDM TOOLBAR IN SOLIDWORKS
This is most important tool you can add to your Solidworks. It gives you all the information you need about the file, such as what other components it includes, who has what checked out, what version each component is on, etc. It also lets you control these things, allowing you to check in and out included components, open previous versions, get latest version, etc.
To do this, go to tools > add ins and make sure solidworks PDM is checked in both the left and right boxes.

It will appear in the bar on the right side of your screen, make sure you learn how to use it. Hover over the buttons to see what each is, but each function will be covered later in the guide.
PDM CONTROLS
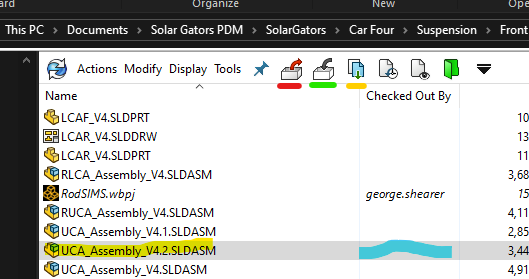
| Function | Color in figure below | Description |
| Check Out | Red | Pulls the file from the server to your computer for editing. Keeps other people from checking out and editing. If you don't do this, the file stays in a read only state. |
| Check In | Green | Puts the file back into the server with whatever changes have been made, and creates a new version. |
| Get Latest | Yellow | Gets the latest version of the file. Typically this is done automatically when checked out or opened, but may need to be done manually in some cases. |
| Get Version | N/A | Gets a specific version from the list of previous versions. |
The following 2 sections deal with opening a file that is not already checked out
OPENING A FILE 1 - small assemblies / basic parts
While in the vault view in file explorer, there are some options available to you. These buttons are typically fine to use, simply highlight the file in question and the buttons will perform the respective action. This method works well for simple parts/assemblies with few to no components/dependencies. If the file is already checked out, the name of the person who has it will be highlighted in the blue area.
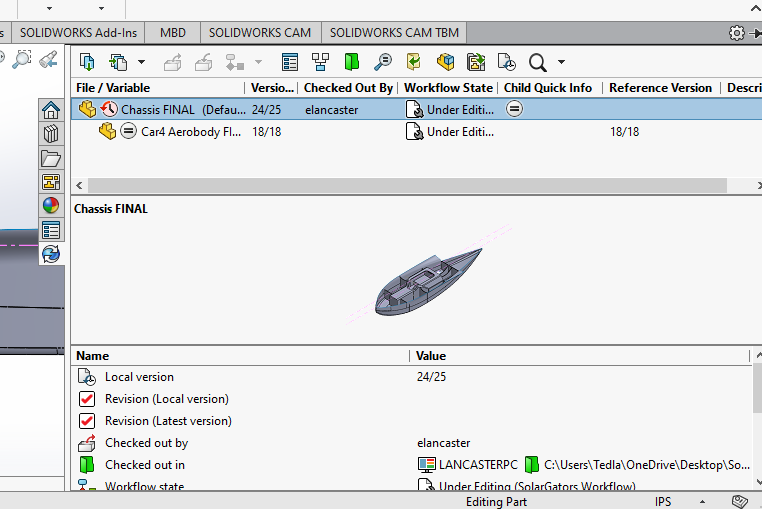
OPENING A FILE 2 - large assemblies / complex parts
For larger files such as assemblies with many components or parts with dependencies, it is better to use the check out window. To access this, do not hit any of the buttons in the vault viewer. Instead, just open the part, this should pull up a window that looks like the figure below.
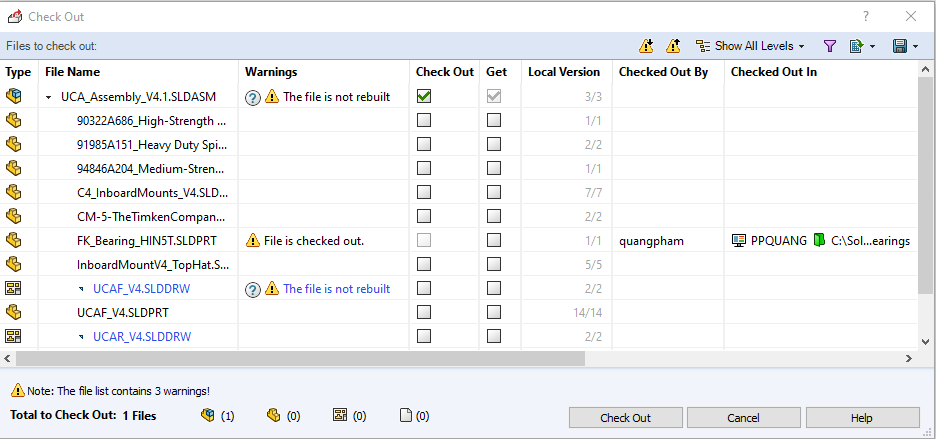
This window lets you control the action being taken for the file in question and every other file included in it. If the file is checked out, then the latest version is automatically "get" -ed. If you want to just view the file, uncheck "check out", but keep "get" checked for the top item. Avoid hitting the cancel button, as this will not "check out" or "get" any of the files.
WORKING ON ASSEMBLIES
When working with files, its important to know what is necessary to be checked out. If you are just adding parts to an assembly, only the assembly needs to be checked out. If you are modifying a part in an assembly, only the part needs to be checked out. However, any rebuilds that happen will not be saved, and there will be a rebuild warning on the assembly next time someone checks out / opens it.
CHECKING IN
Checking in small files is easy, just use the save the part, then use the PDM toolbar in solidworks to check it in before you close it. If you Large assemblies may be more difficult, as others may have parts in the assembly checked out. There are infinite pop ups and warning that might come up when you try to save and check in, so just read them carefully and try to make the best decision that breaks the least things.