
Spotwelding Instructions
The following document serves as a guide to using the U.S. Solid USS-BSW00005 Battery Spot Welder to spot weld nickel strips to cells. Although this SOP is written for this specific model, the information can also apply as general spot-welding guidelines for many small spot welder models.
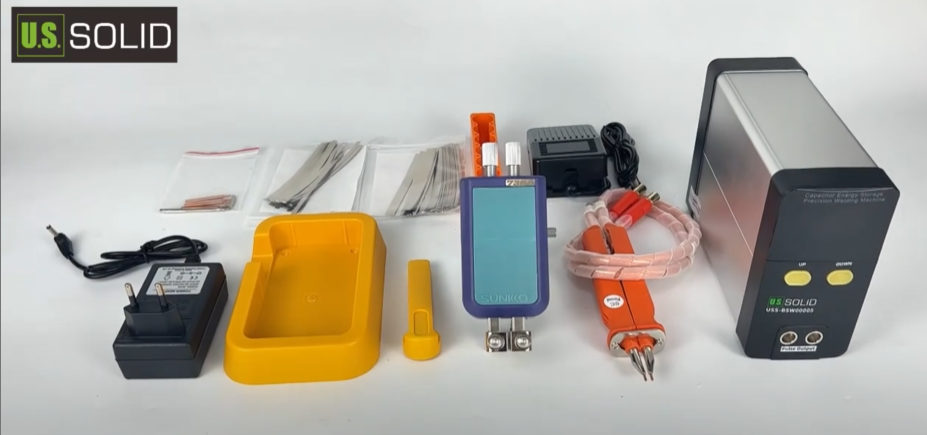
Setup
Remove the welding machine, the power supply adapter, the welding pen, and the foot pedal from the box. Plug in the power adapter and the foot pedal on the back right side of the machine and plug the power supply into an outlet. Place the foot pedal on a comfortable spot for your foot to press down on the floor.
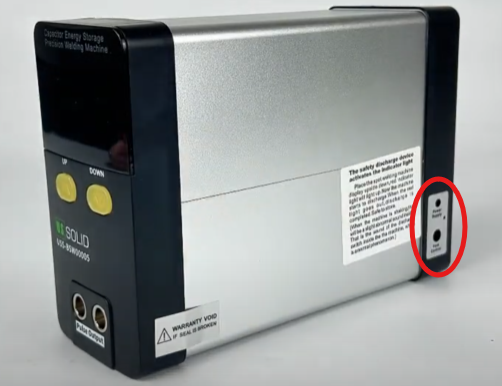
In order to activate the machine into manual welding mode (MT), ensure the machine is off (if not press both the up and down arrows on the front simultaneously) and press and hold down the foot pedal. While holding it down, press the up and down arrow buttons on the front of the machine to turn it on, and once the screen turns on, step off of the pedal. Ensure that MT appears at the bottom of the indicators on the right side of the screen, indicating that the machine is in manual mode.
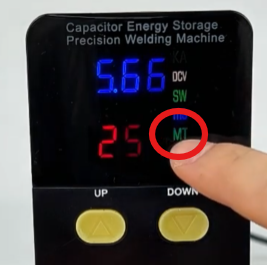
The manual welding mode with the foot pedal is recommended, although if you wish to use the automatic welding mode, please read the manual.
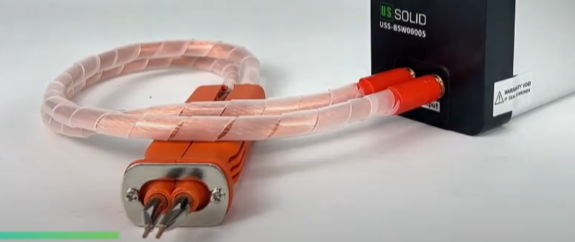
With the machine now on, plug in the two welding pen connectors into the circular ports on the front of the device marked “Pulse Output”. You may have to make sure the connectors are properly aligned with the ports and push them in quite hard, as the fit is tight. It does not matter which connector is inserted into each port.
Spot Welding
When spot welding, there are three main factors to take into consideration to produce a good weld:
-
Power
-
Time
-
Pressure
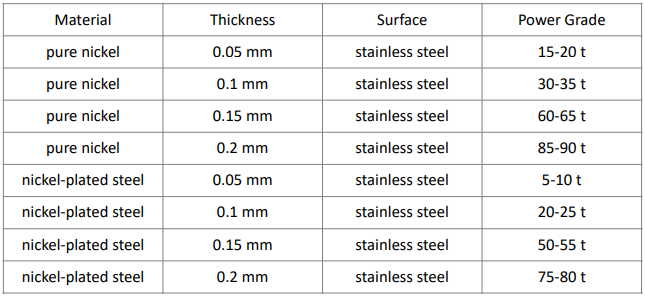
For the USS-BSW00005, refer to this table to set the pulse time to the proper power grade:
-
(We found that raising the weld time about 10 t more than the provided table values works well to create a stronger weld with minimal sparks and damage.)
When ready to spot weld, refer to the following steps:
-
Before Spotwelding, measure the voltage of the cells and make sure they are the same to the tenths place. Putting cells that have wildly different voltages in parallel could be catastrophic.
-
Align cells within spacer in the configuration that you wish for them to be welded in, ensuring that the terminal ends of all cells are parallel and flush to each other.
-
Take a nickel strip and cut it to a length that is slightly shorter than the total length of the row of cells you wish to weld together, ensuring that nickel is not hanging off the edges of the end cells.
-
Properly align the nickel strip on top of the row of cells so that each cell is making even and symmetrical contact with the strip.
-
Ensure that the “CH” indicator (charging) is not present on the machine screen and that the voltage is reading at least 5.4 V.
-
Grab the welding pen and hold down the nickel strip in the set position while placing the two welding pins on the strip at a spot on the center of the first cell you wish to weld.
-
-
If you are welding a long strip that contacts more than two cells in a row, it is recommended that the first cell that you weld is one at the center of the strip, making it easier to align the strip with the rest of the cells.
-
-
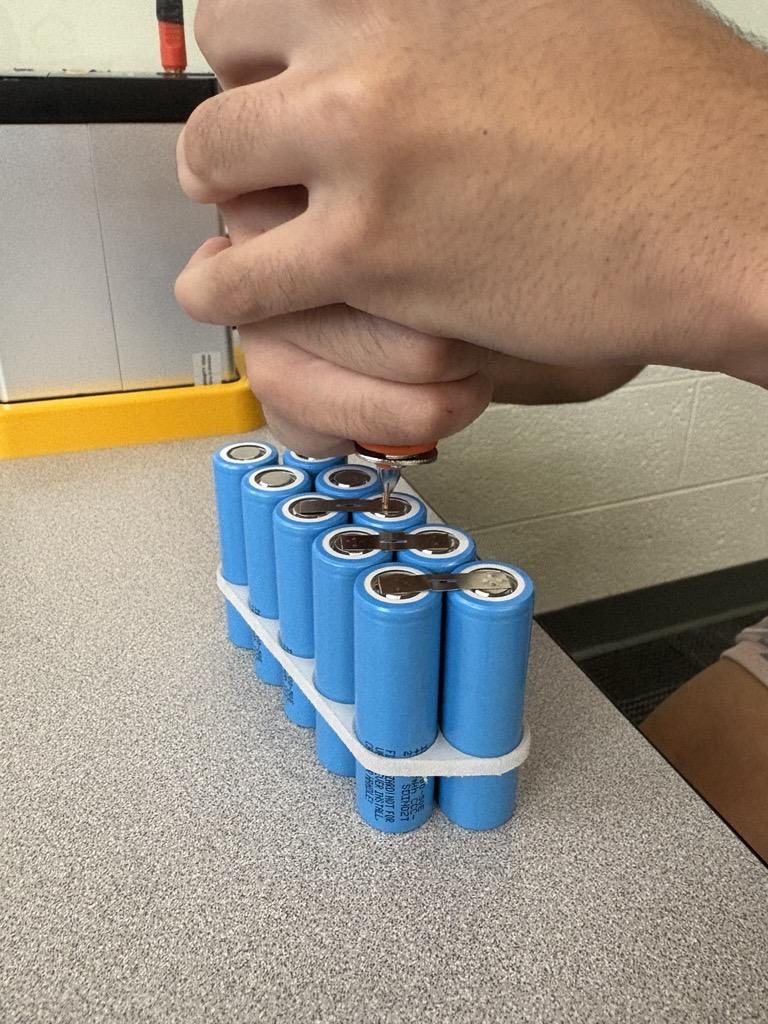
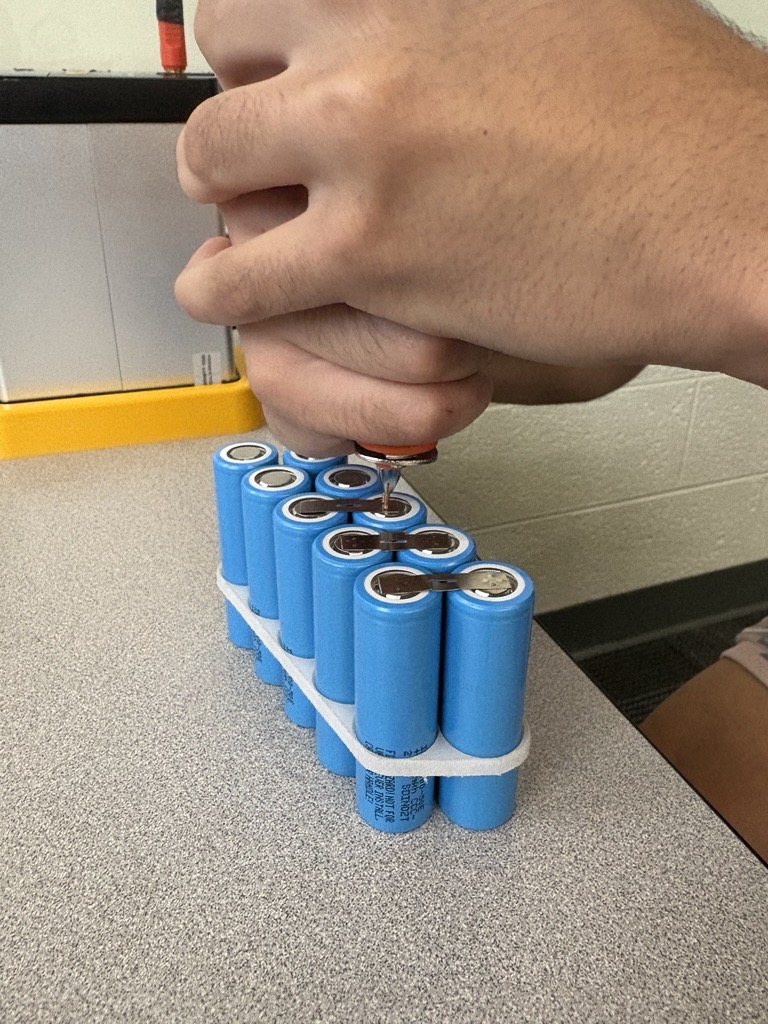
With a spot chosen and contact made, ensure that the two pins of the pen are making level and even contact, and that the pen is aligned as perpendicular as possible to the strip.
-
While keeping the pen as level as possible, push down and apply pressure onto the strip with the pen until a click is heard and felt within the pen. Apply a small amount of extra pressure after.
-
-
Generally, the more pressure that is used, the better the weld, but ensure to not apply so much pressure that the material is completely pierced through, which could damage the cell.
-
-
When ready, press down on the foot pedal to weld.
-
During the welding, pay attention to any sparks that fly out and what direction they fly in.
-
-
If there is an exaggerated volume of sparks, you may have set the pulse time too high, or you may not be applying enough pressure.
-
-
-
If there is a small amount of sparks, the pressure you applied may have been slightly unlevel or uneven between the two pins. The direction in which the sparks flew generally indicates the direction you want to lean the pen slightly towards to account for this and reduce sparks.
-
-
-
Less sparks generally indicates a higher quality weld.
-
-
After the welding is done, continue to hold down the pen and apply pressure for about 1-2 seconds, which allows the weld to remain compressed as it begins to cool.
-
Ensure that the voltage has recharged to at least 5.4 V and repeat steps 6-10 for the same cell but with the pins of the pen aligned to be perpendicular with the weld just done on the same cell, creating a “cross” weld pattern.
-
Ensure that pins are clean (if not, clean with abrasive pad) and that voltage is recharged to at least 5.4V before repeating these steps on the other cells.
-
When finished spotwelding, make sure to store cells in a place where their terminals cannot touch any metal or other cells as this could cause a short and lead to fire.