
1: Starting a Project
Importing Geometry
To start a project, either: 1) open Ansys Workbench, or 2) use the Workbench button in Solidworks on whatever model you would like to import. Option one will open a blank project, while option 2 will open a project with a geometry system that is linked to the Solidworks part file.
If you chose option one, the first thing you should do is drop a geometry component system into your project. Right click the geometry step (not the system, more details here), hover over import geometry, and select your desired Solidworks part as seen in figure 1.
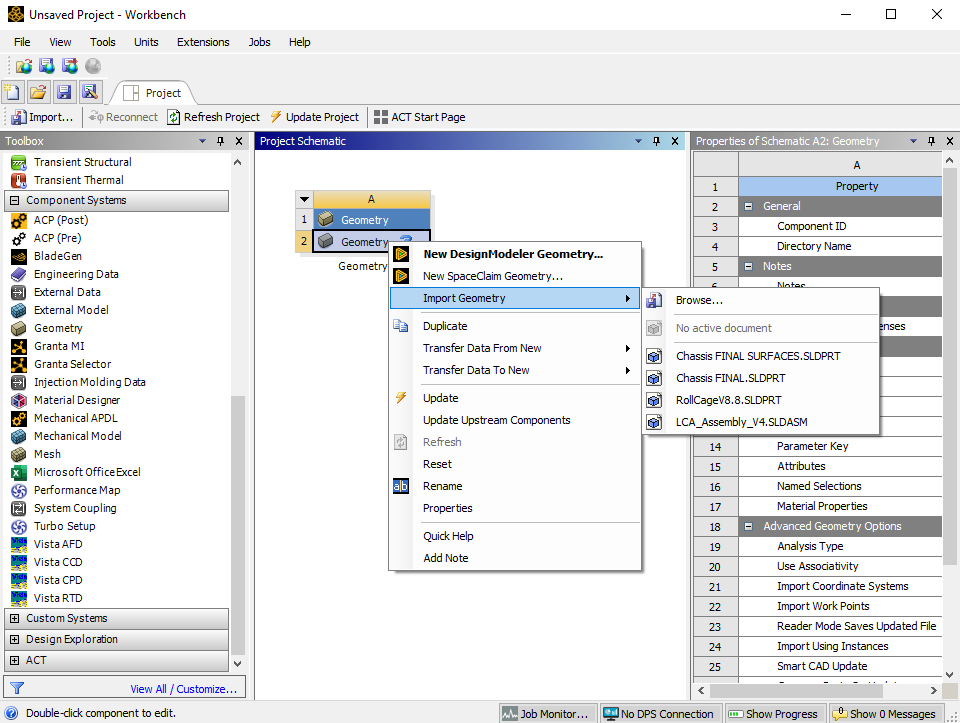
Fig 1. Linking your Solidworks part geometry
This is the first step to any project. There are additional ways to create geometry for simulation by using Ansys's own tools such as DesignModeler of SpaceClaim, but these softwares don't run well for complex parts so we do not use them often. There are however some use cases for them when trying to model very simple projects, but that is not covered in these guides. Additionally other types of general files can be imported such as .step, .iges, etc. but these are not recommended as they do not let you iterate or parameterize your simulation.
If you cannot import a Solidworks method from either option 1 or 2, then you did not set up your CAD interfaces correctly. Go back and do this now before attempting any additional work in Ansys, it will be a waste of your time otherwise. See the install guide for more info.
Working with your linked geometry
Once you've linked the geometry, any changes you make to the model in Solidworks will not update automatically. To bring them into your project, right click the geometry step and click on Update From CAD. This will reprocess the model. Ansys can automatically compensate for small changes such as existing dimension. However, if new faces/bodies are created or renamed for whatever reason, some additional user input will be needed to rerun the project.
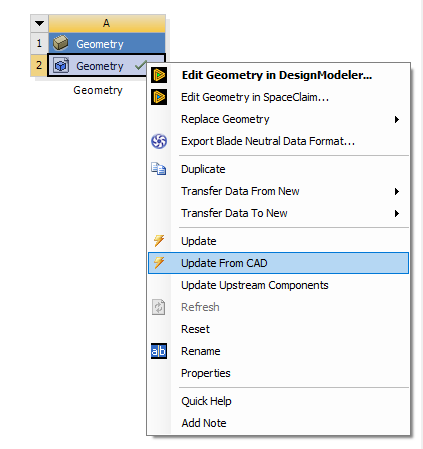
Fig 2. Updating the model from Solidworks to Ansys
No comments to display
No comments to display